

TEMPLE OF THE HIGHPRIESTS WALKTHROUGH
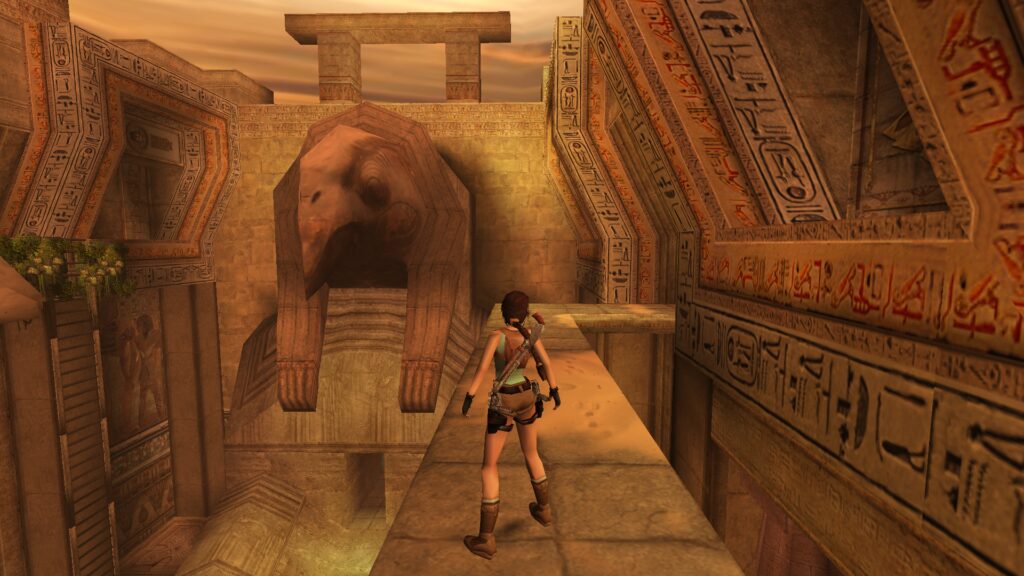
COURTYARD (SECRET 10 & SUPPLIES): As you enter, directly opposite the entrance (W) you’ll see the entrance to the Seth Chambers, and a huge olive tree just to the right of it. You’ll find 4xSP in the shallow water beneath the large olive tree, and 3xSM in and beneath the smaller tree behind it. Climb on the rocky ledge behind this smaller tree and find a tunnel with SECRET 10: RB. Now you can decide which challenge you want to solve first. You are free to choose the Challenge of Apis first, and to complete the Challenge of Seth before the Challenge of Horus, or vice versa.
COURTYARD (CENTAURS): No matter which sequence of the challenges you choose, after every challenge, you’ll be attacked by two Centaurs in the courtyard upon your return (in total, six Centaurs). There are several ways to defeat them, depending on the amount of ammo you have. The easiest way to defeat them is to shoot one poison arrow at each Centaur, then run/sprint into the NW corner where the water is deeper and where you can hide in the UW tunnel and wait for the Centaurs to die of poison. Or you can select a direct approach and kill them with red shells, explosive arrows, revolver bullets, or even Uzis. Choose whichever strategy works best for you. Also, after every battle, two cages beneath the Courtyard will open. Make sure to explore these cages, because you’ll find a lot of supplies there: Flares, 8xSS, Shotgun, 3xLM, Grenades, Revolver, 2xRB, 2 x Arrows, Uzis and 2xUC. Some of these ammo clips and medipacks will re-appear if you run out of them, so if you run out of shotgun shells (for example), get back to the cages and check if there’s more shotgun shells to collect.
CHALLENGE OF HORUS

HORUS KEY: The HORUS KEY that unlocks the Chambers of Horus in the NW corner of the courtyard is under the water, in the NW corner of the courtyard, literally beneath the entrance to the Chambers of Horus. On your way back from the UW room, be careful and avoid the scissors blades. Unlock the Chambers of Horus and enter. The door closes behind Lara. The exit door is to the right, currently shut. Go down and into the large room with a giant Horus statue (on Lara’s right). Enter the doorway straight ahead. Our task here is to find two Eyes of Horus and give them back to the god of air, and in return, he’ll give us the Book.
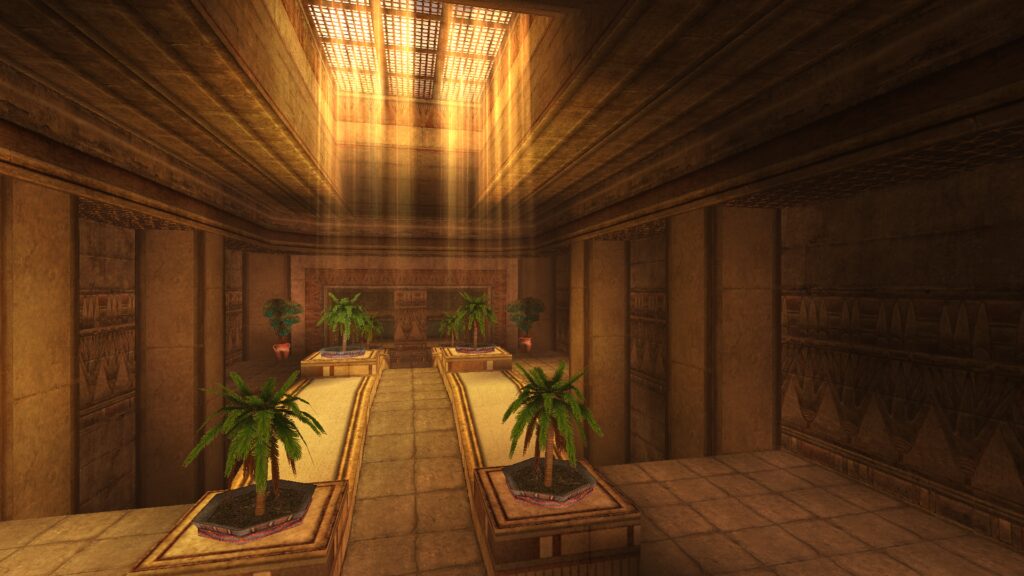
ELEVATOR PUZZLE: There are several ways to solve this puzzle, and this walkthrough describes the shortest and most economic. The golden platform ahead with curtains and burners is actually an elevator, currently on floor 1. We have to send it to floor 4 and also open a few doors in the elevator shaft and move a few wooden cages that you can see above, just beneath the ceiling. The WL to the left of the elevator shaft sends the elevator to floor 1, and you don’t have to use it. The WL to the right of the elevator sends the elevator to floor 2, so use it now. The elevator goes up, and now you can crawl into the opening at the bottom of the elevator shaft (basement level). To the right you’ll find a button, so press it to raise a block (not seen in the flyby) and to open a door on floor 5 in the elevator shaft. Make a mental note of the raised block next to this button. There’s a WL in the other corner of the basement room, which sends the elevator to floor 2, in case you end up in the basement when the elevator is on floor 1. If it’s already on floor 2, ignore this lever, in that case it does nothing. Crawl back out into the elevator room.
Alternatively, RJ from the winged platform to grab the elevator roof, pull up and RJ to grab the golden bar on the other side. Swing about it and land on the golden trapdoor. Once there, RJ to grab the wall with the greenery (E), pull into the opening above and jump with Action into the nearest suspended wooden cage. RJ with Action onto the next one, then onto the third one, and RJ into the tunnel in the wall S. Use the WL here to send the elevator to floor 3.
With the elevator on floor 3, make your way back to the first suspended wooden cage (from this side of the room, it will be the third). Once there, RJ to land on the elevator roof. Crawl into the tunnel here and use the WL on the right to send the elevator to floor 4. Go to the other side of the room, climb onto the raised block (it will be raised only if you used the button in the basement room), and RJ to grab the greenery on the central pillar. Climb around the central pillar to the other side and drop to grab the JS. This will open a door on level 2 and also lower the block in the basement. Go back out and onto the elevator floor (it’s on floor 4 now). Jump into the water below, climb out and re-enter the basement room. Go right and into a narrow tunnel with the ladder. Climb up to the 2nd floor. Go right, then RJ with Grab across the elevator shaft, and use the button here to “mobilize” one of those three suspended wooden cages on the N wall and to lower another block (which opens another shortcut), just above the entrance. Drop down to the floor and make your way back to the stone ledge above the entrance (via the mobile wooden platform in the SE corner). Enter the doorway here, then go right at the intersection, climb the ladder and enter the passage where you sent the elevator to floor 3. Do not touch the switch again. RJ with Action onto the nearest suspended wooden cage, then RJ with Action onto the second, and carefully jump (with Action) on the moving wooden cage near the W wall (when it goes down). RJ from this platform when it’s going up, to land on the elevator roof (the elevator is on floor 4).
Use the button behind the open door here to lower a wooden cage near the N wall. Go out and carefully jump from the elevator roof to grab the golden bar on the wall, swing about it and jump to grab the edge of the wooden cage in the corner (you’ve just lowered it). Jump with Action into the next suspended cage, then into the third one. Here, carefully jump with grab into the suspended wooden cage that goes up and down (when it goes down). Turn to face the entrance (E), and RJ to grab the JS above the door when the wooden cage is near its lowest point. This will open the door outside in the main Chamber of Horus. When the flyby ends, go forward into the passage, then left and up the stairs, to emerge high above the main Chamber of Horus. RJ diagonally to the right to land on the platform with obelisks.
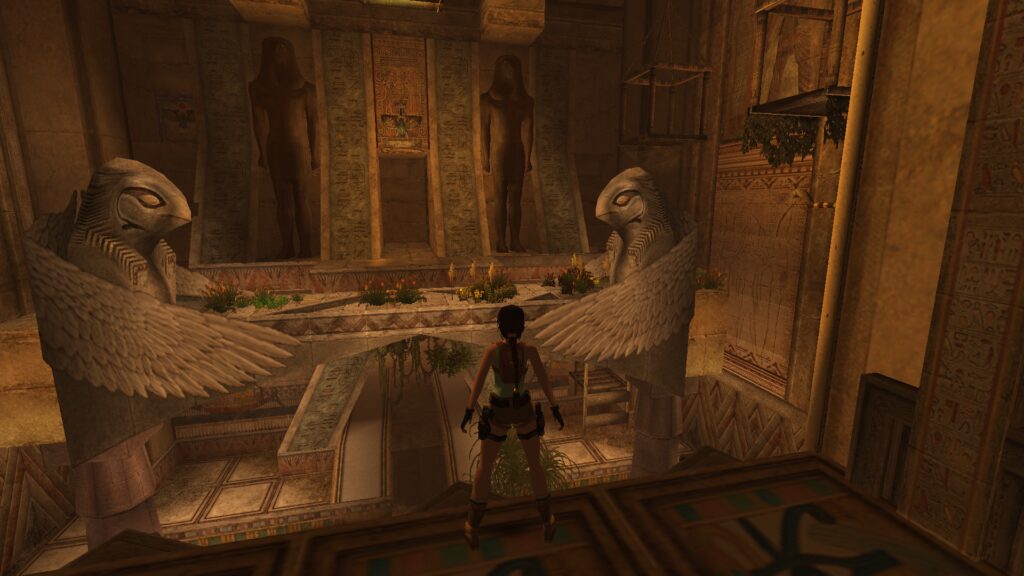
PUSHABLE BARS: To get to the other side (E) of the main Chamber of Horus, you have to swing about four golden bars, but right now, only two golden bars are in place. In the side room S you’ll see two pushable obelisks, each of them having a golden bar attached to it. As you assume, you have to push these two obelisks out into the main Chamber of Horus and place them between the other two obelisks, to be able to use the golden bars and get to the other side of the Chamber of Horus. LoreRaider’s video describes one way to do that (faster). This walkthrough describes the alternative route (select the one you like better). For now, from the main Chamber of Horus, jump onto the raised ledge with a PB, and push that block out, so that you can climb via this block onto the floor above. Enter the room S, jump onto the suspended wooden cage and RJ to grab the JS ahead. Drop into the pool in the room with pushable obelisks. Four blocks have been raised in this room, to the left and right, and one block in the water, that connects two ledges between the raised blocks.
Push one obelisk across this raised block in the water, to stand near the taller raised block. Then push the other obelisk twice due N. Jump from the lower golden block onto the bar, swing about, jump and grab the other bar, swing about it and land on the taller block. RJ to grab the crevice on the wall W, shimmy a bit to the left, jump up and climb into the alcove. Use the button here, then drop to the crevice again, shimmy to the left, again jump up and climb into the second alcove with a button. Press it, and two more blocks will be raised in the pool behind Lara. Safely drop to the ground. Now push two obelisks with bars to stand between the other two raised blocks and repeat the same process to get into two alcoves on the E wall. Pressing these two buttons will raise two last blocks in the pool and lower four blocks on the path. Now you can push/pull two obelisks out into the main Chamber of Horus and place them between the other two obelisks with golden bars. RJ diagonally to land into the pool at the feet of the giant Horus statue.
EYE OF HORUS 1: Climb out of the water to the right of the giant Horus statue, and climb into the alcove there, where you can press a button. This will raise a block in the pool, so you can now climb out of this pool on the other side (S). Go back into the Elevator room (the passage to the right) and use the moving wooden platform in the NW corner to get to the ledge above the entrance. Go up the stairs and save before you try to jump and grab the first golden bar. RJ and grab the first golden bar, swing about it, jump to grab the second, then repeat the same process until you make it into the open doorway (this door opens with the JS in the Elevator room). Go down the stairs, jump to the right and take EYE OF HORUS 1 from the pedestal. Make your way to the other side of the room, climb the ladder and jump back off of the ladder, with twist in mid-air and grab the edge of the central pillar. Shimmy around the corner to the right, and jump up to grab a crevice above Lara, in the large light shaft. Shimmy to the right, then jump up to grab another crevice. Keep shimmying to the right and jumping for a higher crevice, until you can pull up onto the tunnel above.
EYE OF HORUS 2: In the room with a broken staircase, find a Horus statue with a mirror on its head. Pull this statue once, so that it stands between the stairs and the raised block to the right. Go up the stairs, and RJ diagonally to land on a thin ledge in the main Chamber of Horus, to the right. Follow that ledge into the side room and use the WL here to lower the block on Lara’s left. You can now pull the Horus statue out and into the main Chamber of Horus, all the way to the end of the thin ledge where you jumped. This will lower two blocks back in the side room and also drop two dangling ropes from the ceiling. Go back to the side room and pick up Arrows and EYE OF HORUS 2 from the pedestals. Re-enter the room with the broken stairs and go up the stairs, and then right. RJ to grab the horizontal light beam between two pushable Horus statues, swing about it, jump and grab the dangling rope. Then jump to grab the other dangling rope ahead. Carefully pivot Lara a bit to the right (NW), slide to the end of the rope, swing and carefully jump off from the rope to land on a thin protruding ledge with a sand pile. Drop to grab the greenery below, shimmy a bit to the right and then climb the ladder down, until the blue decorative wall strip is on Lara’s left and right. Back flip from the ladder to land on Horus’s arm. Then RJ into the NW corner behind Horus and press the button to open the door between Horus’s arms.
THE BOOK: From the button, RJ diagonally (banana jump) to grab the ladder, climb up until the decorative blue strip on the wall is on Lara’s left and right, then backflip onto the Horus’s arms again. This time go through the passage between Horus’s arms and draw your weapons (e.g. Shotgun). Kill one giant spider from the doorway, then cross the bridge and kill another giant spider. Take the HORUS KEY from the second spider and go back out into the main Chamber of Horus. Simply RJ to land into the water pool below and climb out of water between Horus’s feet. Follow the long corridor to a keyhole, use the Horus key here and open the door. Go up the stairs, place two Eyes of Horus in their receptacles, and what a flyby: the gates in the room above will open, and also the trapdoor – another shortcut). Use the ladder N to get back to the room above, enter the small room N and take the BOOK from the pedestal. The flyby sequence shows that the exit door has opened. After the flyby, go S, across the pool, and turn left (E). The exit door you’ve just opened is on the left. Go through and on your way back into the Courtyard, eliminate two Centaurs as described above and pick up the goodies from their cages.
CHALLENGE OF APIS
APIS KEY: The entrance to the Chambers of Apis is in the NE corner of the Courtyard. There’s some sand piles, rocks and palms to the right of the entrance to the Chambers of Apis (E). Climb into the tunnel behind the palms and find the APIS KEY inside. Go back out and unlock the Chambers of Apis. Climb down and go down the ramp, until you emerge in a room with a rotating ram above a quicksand pit. Drop onto the ledge shaped like a cross. Make your way across to the other side and press the button to raise four blocks in the room. Jump diagonally to the ledge to the left or right of the button, then a RJ to land behind the raised block N. Then jump to grab the crevice below the entrance, jump up to grab the edge of the entrance, and climb up. Time your jump onto the raised block ahead, when the rotating ram moves to the right. SJ or RJ as necessary from one block to another counter-clockwise, until you can jump into the alcove E. Press the button here to open the door S, and SJ or RJ as necessary across the raised block, again counter-clockwise, avoiding the rotating ram, until you can jump through the open door. Carefully time your running jumps in the next room, to avoid lateral rams and don’t fall into the quicksand. Open the door ahead with the button and enter.
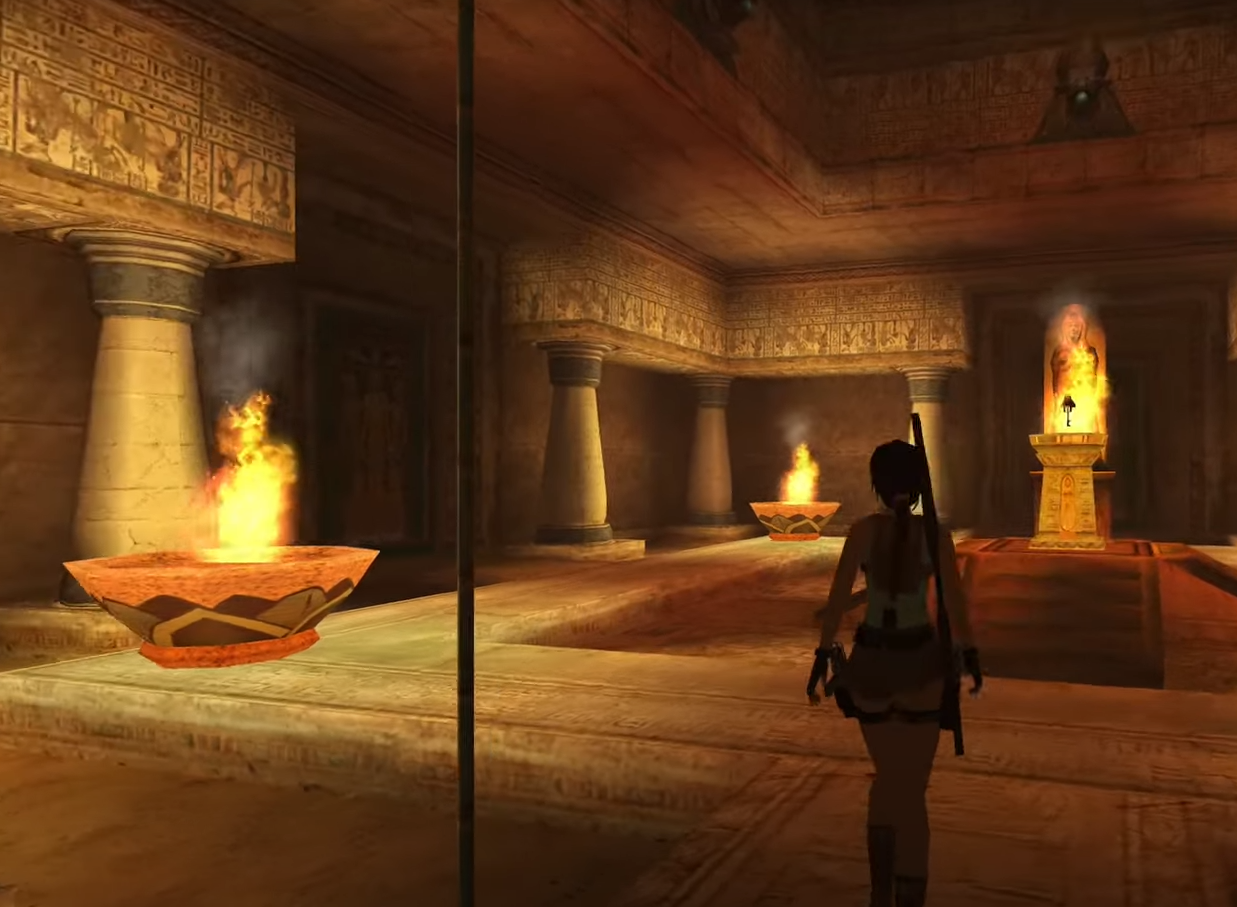
SETH KEY: Look up and locate three heads of Apis with gems in their mouth. Use Revolver with Laser Sight to break all three gems, and the fire on the pedestal ahead will go out. Take the SETH KEY. The entrance door will close and three doors around the room will open. Three Apises will enter the room, with their mighty hammers. Either eliminate them with red shells or Revolver or hit each of them with a poison arrow and evade their attacks until they die of poison. Whichever strategy you choose, make sure not to fall into the quicksand as you evade their hammers. Once they’re dead, the door on the upper level will open. In the three side rooms you’ll find 3xSS. Jump to grab any of the two blue vertical poles, climb up and back flip onto the upper level. Go through the open door and out into the Courtyard. Two Centaurs will attack as you re-enter the Courtyard. Kill them as described above and pick up the goodies from their caves.
CHALLENGE OF SETH
THROUGH THE BLADES: Unlock the Chambers of Seth with the key you found in the Chambers of Apis. You have to swing about the horizontal poles around the room, timing your jumps when the circular wall blades retract (counterclockwise). When you get to the button, press it to open the door behind Lara. Climb down the ladder to the lower level. Here some horizontal knives pop out of the right-hand wall. The best strategy here is to time your RJ as one knife approaches Lara, to jump over the knife, and then immediately jump again to avoid it and get to the corner, where it’s safe. Repeat the same for the second knife. When you approach the third knife, a different approach is necessary. One strategy to get through is to start running when the knife is about to retract, steering Lara just a bit to the left as she runs. Then jump while running a bit diagonally to the left, to grab a crevice in the pillar ahead. Shimmy around the corner until you can climb up into an alcove. Run off out of this alcove diagonally to land on the broken pillar below. Drop to hang from this pillar, drop to grab the crevice below, and shimmy to the right and around the corner, where you can drop into the passage below. Another set of jumps through circular traps awaits. You have to RJ with grab to the next ledge when the nearest circular blade retracts, counterclockwise around the room, until you reach the door with a button. Of course, try not to fall into the quicksand around the central pyramid. Press the button to open the door and enter the Chamber of Seth.
CHAMBER OF SETH: Make sure to save your game as you enter. A diary entry will inform you that Seth is immortal and that you need help from Isis if you want to defeat him. This means that you must find two Isis Knots, so that Isis can tie down Seth to the matter and make him mortal. Avoid his fireballs and blue rays by flipping sideways or sprinting/running around the room, but make sure not to fall off the edges into the quicksand below, or through two holes in the middle of the platform, as the fall will kill Lara. 2xSS can be found near the skeletons on the left, and in case you run out of shells, they will re-appear here, so have that in mind.
As you avoid Seth’s attacks, locate two pushable golden pyramids. Move them both aside and use the Pickaxe (Crowbar) in two slots where you found these two golden pyramids, in both cases facing their respective doors (left-hand slot facing S, right-hand slot facing N). The double doors will open, and two giant spiders will attack in each case. Eliminate them with the revolver or red shells, at the same time avoiding Seth attacks. Now you can push/pull the two golden pyramids across the deactivated burners and through the holes in the floor. NOTE: Lara is partially immune to Seth’s attacks as she pushes or pulls the golden pyramids, but she’s still vulnerable, so be quick and efficient. Once both golden pyramids are on the lower level, run toward the giant Seth statue, where you see a huge statue of goddess Isis. RJ across the pit into Seth’s lap and note two receptacles behind Isis. RJ from the right arm of Seth (to the left of Isis) a bit diagonally, into the corner of the room, with ladders. Climb down the ladder and RJ diagonally onto Seth’s right foot.
ISIS KNOTS: SJ to grab the pole, swing about it and jump onto the central ledge with two golden pyramids. Push/pull these pyramids onto the marked tiles under two double hammers, and then use the FL to break the golden pyramids with the hammers. Pick up 2 x ISIS KNOT. Make your way back to Seth’s feet via the parallel bar and RJ diagonally into the SW corner. Go up the ladder, then again up the next ladder. RJ diagonally from here onto Seth’s right arm and place two Isis Knots into their receptacles behind Isis. In the flyby you’ll see rays coming out of Isis’s crown and hitting Seth. Remember: Seth is vulnerable only while these rays are hitting him (as long as he walks and not flies or shoots). RJ back onto the central ledge with Seth. Evade his attacks if necessary and wait for the next rays of Isis to hit Seth. Prepare the Revolver or Shotgun (red shells). When the rays of Isis hit Seth again, shoot at him from the Revolver (if he walks) and kill him with one or maximum two Revolver bullets. If he flies while the rays of Isis hit him, evade his attacks and wait for a better moment, because you don’t want to waste the Revolver ammo or red shells.
KEY TO HAMUNAPTRA: Once Seth is dead, climb back down where you used the lever and hammers, use two WLs on the pillars to raise two blocks in the quicksand and use them to reach the scribe statue, where you’ll find the KEY TO HAMUNAPTRA. Make your way back to the upper level once again and leave through the door SE. Open another door with the button and proceed to the next wider corridor. Open the gate here with the button to the left and drop into a deep shaft with sand.
DEEP SHAFT WITH RISING SAND: Press the button here to start the “sand pumps”. The sand will slowly be pumped into this room, and the sand level below Lara’s feet will start to rise soon. First, you’ll think that nothing has happened. Just be patient. A few seconds after having pressed the button, a rotating knife will appear on the floor. The best strategy here is to go after it, slowly, as it rotates across the floor. Another rotating knife will also pop out, so remain as close to the wall as possible as you go around the room, following one of these knifes (clockwise). The level of the sand beneath Lara will start to rise, and two more rotating knives will appear. Just apply the same strategy as the level of the sand rises. Eventually, all four knives will retract. Don’t try to climb into the opening from this room while the sand level is still rising (this is an elevator, too, and elevators in the Editor are also hazards). Either wait for the level of the sand to stop rising (for the elevator to stop) or jump into the opening slightly before the elevator stops. Open the door with the button and re-enter the Courtyard. Eliminate two Centaurs that attack and explore their cages for goodies.
FINAL BATTLE AND ENDING
ACROSS THE QUICKSAND: To the left and right of the giant ankh in the Courtyard, you’ll see two gongs with Eyes of Horus painted on them. Use the Bow or Revolver with the Laser sight to hit both gongs and open two doors in the side passages to the left and right. Use the Golden Scarab in both these passages to disable the spikes, and make sure to pick up the Golden Scarab after every use. Pull two levers in these side passages to raise two blocks in the central room above the quicksand. Go back out to the Courtyard and use the button to the left of the central gate (below the ankh) to open it and enter. Carefully jump onto the first raised block, then RJ with Grab to the next raised block, and SJ with Grab to climb onto the ledge in front of the last gate. In the Inventory, combine the Book with the Key to Hamunaptra to get the BOOK OF THE DEAD. Place this item on the receptacle to the left to open the gate and enter the final arena. If you have grenades and flares in your Inventory, you can craft explosive arrows before you enter.
FINAL BATTLE: To put it simple: there’s no need to save the ammo once you enter this room. Just use everything you have and don’t worry: you won’t run out of ammo. There are RB and SS to be found in the near left corner, and if you run out of bullets or red shells during this battle, both items will re-appear as many times as you want. Use Revolver to eliminate the dogs as they attack, explosive arrows to eliminate the harpies above, Revolver bullets to eliminate giant spiders, red shells to eliminate the highpriests. Of course, you can opt for different ammo for different enemies here, whichever works best for you. In total, there are six dogs, eight harpies, two giant spiders and at the end, two highpriests. Once they’re all dead, the door N will open. Enter and take the TREASURE MAP. Exit through the door S and jump across the raised block as you did the first time.
FINISH: Once you are back into the Courtyard, run/sprint straight ahead (S) toward the gate that has opened in the meantime. A local is waiting for Lara next to a helicopter, ready to take her back to Jonah and the Village. Lara beat Trinity to the punch, the map to the Hidden Knowledge is in her hands now, she wants to decipher the map and find the Hidden Knowledge before Trinity, but in her next adventure. The game is dedicated to the member of our community, Gerty, who died in 2024, and who will be dearly missed by everyone.
Challenge of the Highpriest – Temple of the Highpriests Walkthrough by Nina Croft
Official Temple of the Highpriests Walkthrough in on other websites
- Temple of the Highpriests Walkthrough on TRLE.net
- Temple of the Highpriests Walkthrough on TRCustoms
Official Temple of the Highpriests Walkthrough in video format
LoreRaider’s Temple of the Highpriests Walkthrough with alternative strategies
Saki Croft’s Temple of the Highpriests Walkthrough with alternative strategies
Download Challenge of the Highpriest and other BtB2024 levels
Download Challenge of the Highpriest by Nina Croft from these pages – it’s free, and you don’t need to install anything – just download and play:
Download Challenge of the Highpriest by clicking the blue “Download” button in the upper left corner of the page: TRCustoms
Download Challenge of the Highpriest by scrolling down and clicking the name of this level: Beyond the Basics 2024 Egypt
Download all BtB2024 Egypt competition levels from this page by clicking the name of the level you want to play: Beyond the Basics 2024 Egypt
Download BtB2024 Egypt assets if you want to build your own custom Tomb Raider level located in Egypt: TRLE.net.
Scroll down to the bottom of the page and to BtB2024 Egypt, where you can download the Builder Package. On this page you can also find assets from previous BtB competitions and download them, e.g. Tibet, Persia, Greece, Khmer Empire, Steampunk…